|
What you download is the full program, but its functionality is extremely limited without the accompanying license file. When you pay, I will send you a personalized license. Detach the file from my email message and save it to the desktop (do not attempt to run the template; that is, do not double-click it). The license file is called CitationChecker.lic. Some email programs may add an extension such as .txt to the license file; if that happens, get rid of the added extension. Copy the license file to the same folder in which you install Citation Checker.dot, as described below. That will unlock all of the program's features.
The personalized license grants you the right to run Citation Checker on your home, office, and laptop computers. You may not transfer the license to another person, nor share it with others in your organization. The license will have your name attached to it.
For Windows:
The best place to install Citation Checker is the Office\Startup or WORD\Startup folder. You install the program by copying the file to that folder. After installation, Citation Checker will be available the next time you start WORD.
For WORD versions before 2007:
By default, the Startup folder is located in C:\Program Files\Microsoft Office\Office (or Office xx)\Startup, or perhaps C:\Program Files\Microsoft Office\Office (or Office xx)\Word\Startup. When Office was installed, an option to change that location was available. If the option was exercised (either overtly by you or covertly by a program you installed), you need to find the Startup folder. You can always find the location via the Tools Menu in WORD. Navigate your way through Tools, Options, File Locations, Startup. Once the program has been placed in the Startup folder, it will remain there. When a new version of the program becomes available on this site, just copy the new version over the previous one. Whenever you start WORD, Citation Checker will appear as an item in the Tools Menu. To use the program, simply click on Citation Checker while your manuscript is on the screen.
The security settings in WORD are designed to protect the computer from unsafe macros. When Citation Checker is installed, WORD may be unhappy and warn you about the impending invasion. You can get rid of that warning by changing your security setting (via Tools, Macro, Security) to "LOW", but that is not recommended because there are bad macros out there.
For WORD 2003, a better way to eliminate the warning is to tell WORD that Citation Checker is safe because it has come from a trusted source. Citation Checker has been digitally signed by David J. Weiss. How you inform WORD may vary slightly depending on your configuration. The objective is to tell Word to trust installed add-ins. If you can make David J. Weiss a trusted source via Tools, Macro, Security, Trusted Publishers (or Trusted Sources), do so by typing David J. Weiss in the text box. Check "Trust all installed add-ins and templates". Then click OK, and WORD will remember that Citation Checker is trustworthy.
For WORD 2007, WORD 2010, WORD 2013, and WORD 2016/365:
The Word\Startup folder may be a little hard to find. For Windows 10, 8 or 8.1, 7, and the Vista operating systems, the default location is the rather obscure (C:\Users\YourUsername\AppData\Roaming\Microsoft\WORD\Startup). That is where the program should go. (If you maintain multiple versions of WORD, copy the program to all of the Startup folders.) Microsoft has perversely, or perhaps merely paternalistically, chosen to hide the AppData folder by default. You need to make it visible in order to put the template and license files in the Startup folder. To unhide the folder using Win 7 or Vista, click on the Windows button at the lower left of the screen, then click on Computer, then Organize (in the upper left corner), then Folder and Search Options, then View, then check Show Hidden Files, Folders, and Drives. To unhide the folder using Windows 8 or 8.1, go to the View tab via Control Panel, Folder Options. Then check Show Hidden Files, Folders, and Drives. For Windows 10, open Settings and type "folder options" in the search box at the upper right. Then click Change search options for files and folders, then select the View tab, wherein you will see the check-box.

When you run WORD, it may complain about the presence of an unsafe macro (usually it does not). If it does complain, the security issue may be addressed most simply by ensuring that the Startup folder is a Trusted Source. Verify that by clicking on the Big Button, then Word Options. Select Trust Center, then Trust Center Settings... That will open a window entitled Trusted Locations. The path to the Word\Startup folder should appear in that list. If it does not, then add that path to the list by clicking on Add new location... be sure that the box left of Disable all Trusted Locations is unchecked.
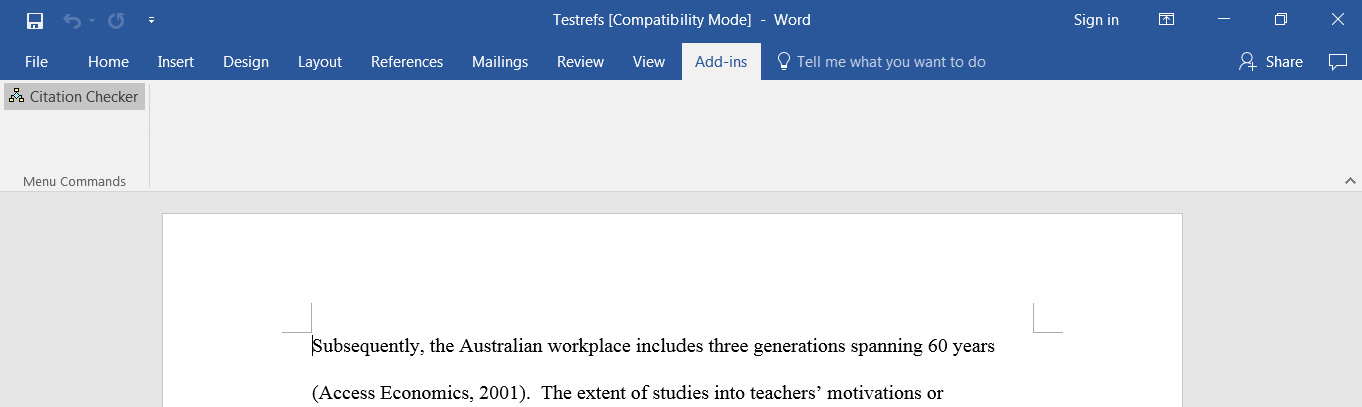
After Microsoft eliminated the Tools menu beginning with WORD 2007, Citation Checker no longer appears automatically and you have to access it manually. With your manuscript on the screen, access Citation Checker by clicking on Add-Ins, then run Citation Checker by clicking its name. If Citation Checker does not appear when you click on Add-Ins, the problem is surely that you didn't find the correct Startup folder. And what if you can't see where to click on Add-Ins? Thank Microsoft's improvements department again. For WORD 2010 or 2013, if Add-Ins does not appear on the main toolbar, then the problem is that WORD has been configured to hide it. To reveal it, click on File, Options, Customize Ribbon. Then check the box for Add-Ins under Main Tabs.
A program user discovered another, perhaps easier for those who are comfortable with Windows, way to access the template if you are using WORD 2007 or later. He created a folder in the Program Files directory, then copied the template and the personalized license to that folder. Then he created a desktop shortcut to the template. Double-clicking the shortcut opens WORD. Next, open the manuscript you want to check. For WORD 2007 there is a tab called Add-Ins, and for WORD 2010, WORD 2013, and WORD 2016/365 there is a ribbon tab called Add-Ins. Citation Checker will appears when you click on Add-Ins. Click Citation Checker to run the program.
For all Word versions:
If the WORD/Startup folder is not in the default location, then you may have to search for it. WORD can help. Open WORD, then click <Alt> + F11 to open the VB Editor. Next, open the Immediate Window by clicking <Control> + G. Type "MsgBox Application.StartupPath" (without the quotes) and click the Enter key. What appears on the screen is the desired location for Citation Checker.dot and the license file.
If WORD reports that the template is blocked because it was downloaded from the internet, you can overcome the protectionism by right-clicking CitationChecker.dot, then clicking Properties at the bottom of the panel. Under the General tab, look for Security at the bottom, then click Unblock, then OK.
For Word for Mac 2011:
For the Mac, installation is a little different. The good news is that you don't have to address security issues. On the negative side, locating the User Templates folder in which Citation Checker.dot and the personalized license file should be placed is slightly challenging. By default, the Mac hides the library containing that folder. If your system still hides it, search the Internet for "Mac hidden library"; there are several ways to make it visible, and they differ for the Mac's various recent operating systems.
A method that might work for OS 10.7 (Mountain Lion) through OS 10.11 (El Capitan) is to go through the Finder to Go, Computer, MacIntoshHD, Applications, Utilities, Terminal. Open Terminal by double-clicking, then type this line exactly:
chflags nohidden ~/Library
Close Terminal by clicking Return (you might be asked for the system password). This procedure will make the library permanently visible.
The path to the User Templates folder using the Finder is (take a deep breath) Go, Computer, MacIntoshHD, Users, Your computer name, Library, Application Support, Microsoft, Office, User Templates. Once you burrow down to that folder, copy CitationChecker.dot and your license file.
A shortcut to the hidden Library is also possible with the OS 10.6 (Lion) operating system through OS 10.11 (El Capitan). From Finder, click Go while holding down the Option key; amazingly, the Library will appear in the drop-down menu (it does not appear when you merely click Go, unless you have made the permanent change using Terminal described above). From there, double-click your way to Application Support, Microsoft, Office, User Templates.
With OS 10.12 (Sierra), Apple changed the way to get to the Library. You can make it always available by going through Finder, Go, Home, View, Show View Options. At the bottom of the panel, check the box for Show Library Folder. To get there after that from Finder, click Go while holding down the Shift key (yes, they changed that from Go + Option Key).
Once the two Citation Checker files have been installed in the User Templates folder, they will remain there permanently (until you remove them). You will not have to go back to the folder until you decide to install an update. Ordinary use of the program requires only a few clicks, as described in the next paragraph.
To run Citation Checker, open your manuscript in WORD. Then click the Tools Menu, then Templates and Add-Ins... A dialog box will open. (If that box is empty, click Add..., then CitationChecker.dot.) Click the checkbox to the left of CitationChecker.dot, then click OK. After that, Citation Checker will appear in the Tools menu. Click Citation Checker (in the Tools Menu) and the manuscript will be processed. Citation Checker will remain active only during the current WORD session. For subsequent sessions during which you want to check a manuscript, you will need to repeat the instructions in this paragraph.
For Word for Mac 2016:
The file locations changed dramatically from those used in the previous version, making it a little harder to install and use macros (just as the Windows setup got more complicated when the Ribbon version was introduced with Office 2007). Your goal is to paste CitationChecker.dot and CitationChecker.lic into a folder from which WORD can operate on them. I suggest you first place these two files on the desktop, then eventually you can drag them into the appropriate folder.
The first step toward finding the folder is the only one that remained the same as in Word 2011, namely that you have to navigate to the Library as described above in the Instructions for Word for Mac 2011. Within the Library, successively open (double-click) a chain of three folders: Group Containers, then UBF8T346G9.Office (I am told that awkward name was imposed by Apple rather than Microsoft), then User Content.
Within the User Content folder, there are two options that will work. I prefer the option that uses the Startup folder, because once the files are in there, it is not necessary to load Citation Checker every time you want to use it. If you choose this option, double-click Startup, then double-click Word. The folder will be empty unless you have installed another program that has placed files in Word's startup folder. Paste the two files in that folder. Installation is over. When you open your manuscript in WORD, you can click on the View tab, and then click on Macros. A list will drop down, with the heading Macros in: All active templates and documents. If the list is very long, you can shorten it by clicking on the right of the heading, then changing the heading to Macros in: CitationChecker.dot (global template). Within the drop-down list shown below, you should select CitationChecker.ScanDocument. When you click on Run, Citation Checker will start processing your document.
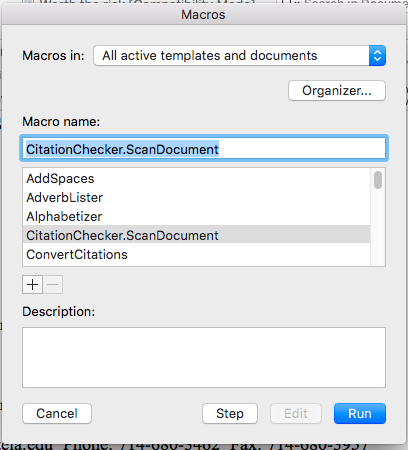
The second option within the User Content folder is to place the two files in the Templates folder. When you open that folder, you will see your other templates, including Normal.dotm. Paste the two files. Installation is over. However, when you open your manuscript in WORD, you will not have immediate access to Citation Checker. It must be loaded. There are two methods that can be used. One way is to click on the Tools Menu, then Templates and Add-Ins. The Templates and Add-ins form will appear. The first time you do this, you need to click on the plus sign below the list box under Global Templates and Add-ins (after the first time, Citation Checker will appear in the list, but it will not be checked). A path to the Templates folder will appear, and you can select Citation Checker from within it. Within the list box, check to the left of CitationChecker.dot, then OK. Then click the View tab, and you will see the Macros drop-down list above. Select CitationChecker.ScanDocument. When you click on Run, Citation Checker will start processing your document. The second method is available if you have chosen to activate the Developer tab. You can click on Word Add-ins from there, and the Templates and Add-Ins form will appear. From that point, follow the steps described for the first method.
The drawback to the Templates folder option is that you have to load CitationChecker.dot every time you need it. The advantage is that you won't have CitationChecker occupying the computer's short-term memory when you don't need it. But with modern computers, competition for memory space is not much of a consideration, so I suggest you place the two files in Word's Startup folder.
|
|
